Industrial Modern End Tables (and Collaboration!)
- Jennie

- Oct 10, 2019
- 4 min read
Updated: Oct 17, 2020
I know what you’re thinking based on the title….are they back?? Are they actually building again?!!
Uhhh….kind of! We have finally made it down to Texas and are all moved into our new place.
We’re setting up the shop right after I finish this post, actually. BUT – the reason we were able to start building again (since our garage is currently a holding place for no less than 40 cardboard boxes….) is because we took a trip to Oklahoma City last week to visit Jonny from Jonny Builds and Richard from 42Fab.
We did a little collaboration while at the same time finishing some end tables that a client down here in Texas wanted! Soooo it kind of worked out perfectly since Jonny has hookups to get awesome reclaimed wood and Richard runs his own metal fabrication business. It just so happened we needed reclaimed table tops and custom metal legs for this project!!
Before I start on how we built these tables, I highly recommend checking out Jonny and Richard’s channels!! They both put out awesome content and have been supporting us ever since we started out as baby YouTubers.
The Build: Table Tops and Bottom Shelves
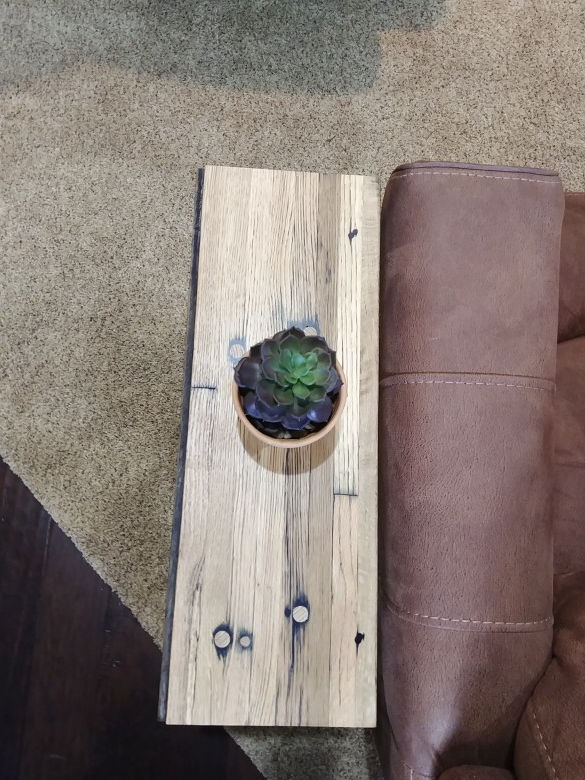
Our client really wanted these tables to be industrial modern since they were starting to redo their living room. So what does that mean, exactly? Probably some metal legs, rustic wood with touches of darker colors incorporated, and straight lines. The wood we ended up finding for the tops was actually the flooring from old shipping containers!
It was pretty dirty when we first found it and there were some old bolts still in the planks from where they were attached to the floor. We first had to remove the bolts and drill out the holes to 3/4″ diameters.
We then sent them through the planer a few times and they came out looking awesome!!
After that we filled the holes with some wood glue and oak dowels – cutting them down the be flush with the boards as seen below (using a flush cut trim saw):


Because there were still quite a few gaps surrounding the dowels, we decided to fill them with black epoxy! After epoxy, planer, sanding, and finish, the tops were perfectly smooth with no gaps – the black epoxy and dowels also added to the whole “industrial” look. We then cut 3/4″ squares out of the shelves that would sit at the bottom of the tables so that the steel tubing we were using for the legs would fit in and they would look flush with the bases.

The Build: Metal Legs
To make the metal legs, we first started by cutting all of our 3/4″ steel tubing down to the dimensions we needed using a metal chop saw. Since we wanted a shelf at the bottom of the tables, we had to create two horizontal cross members to support it. We did this by cutting 3/4″ notches into the tubing using a metal bandsaw so that the vertical legs and horizontal cross members could be seamlessly welded together.
After that we used a grinder to smooth out all of our welds. Grinders are magical things. Bad weld?? You’d never know!


We then had to figure out how we wanted to attach the wood tops to the legs (we wanted the planks to look like they were just sitting on top of the metal base). This is where Richard’s welding experience came in….and, ya know, his plasma cnc…
He created a file and carved out some tiny triangles with a hole in the middle to weld into the corners of the bases. That way, we could set the table top and shelves into place and simply screw them in from the bottom.
After a couple coats of primer and black spray paint, the legs were ready to go!! We attached both table tops and shelves onto the bases using just a few screws (and Richard’s fancy metal tabs that we welded into the corners) and they were done!!
A trip to Oklahoma City and 2 collaborations later, our client’s tables were done!


Pricing
Because we weren’t building in our own shop with our own materials, the pricing on these was a bit weird. The good part is, we have a very rigid pricing structure that we use for every project, so we at least have some sort of guide when it comes to pricing even our most non-traditional builds. All in all, we priced these at $250 each based on labor and material costs. This is consistent with what we would have charged if we were building them in our own shop, even though we drove all the way to Oklahoma City to build them. That’s why we spend so much time trying to create systems and structures for ourselves! So that despite any circumstances, we can at least stay consistent.
All in all, it was awesome to get to collaborate with Jonny and Richard while finally getting back to building after our LONG move! We had a lot of fun along the way. If you want to check out the video we did on ALL of the above, check it out below!! We also did a fun little bonus video for Tik Tok 🙂 If you have a Tik Tok account, go check us out! We basically just goof off and make jokes about woodworking (lol, what nerds).
This post may contain affiliate links for products we used to create this project! If you’d like to check them out, we do get a small percentage of the sale and they are of no extra cost to you! It all goes towards supporting the content creation of Jennie and Davis. BUT – we do not take tool sponsorships and there were no tool endorsements. Just our honest opinions!


Comentários